Drupal 8 installation and configuration:
an example site
Contact Forms
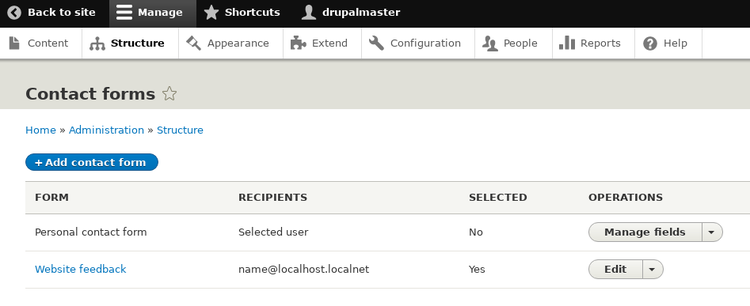
The page for contact form setting is in the "structure" section of
the administration menu. Through contact forms a site visitor can
send an email to the site maintainer or at a defined email address.
Two contact forms are pre-defined:
the first is for messages among registered users,
the second one is a generic form for "Website feedback".
We will not use these, but will create our contact forms:
the first reachable from a main menu entry
and the second inserted in a special block, to be shown only
in selected pages.
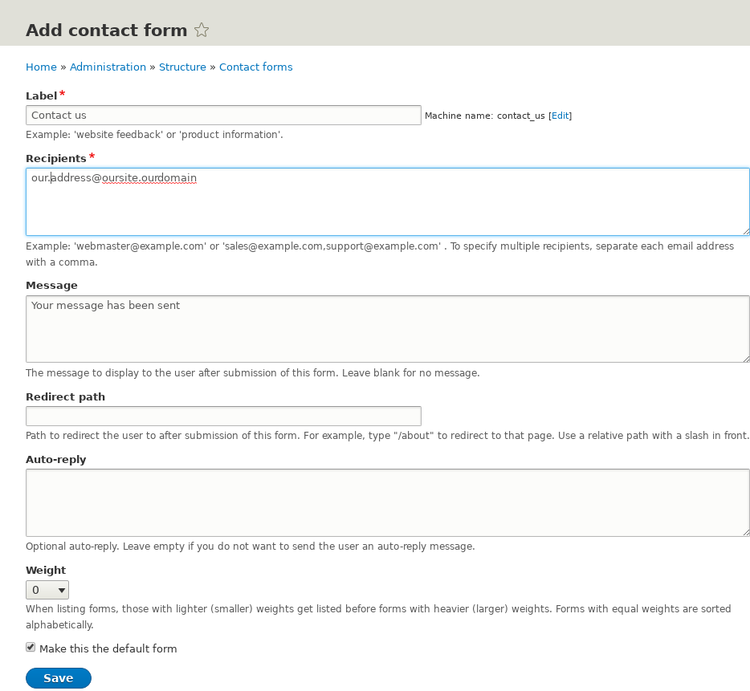
To create a contact form we click on the "Add contact form" button
and we arrive at the page shown in the following picture;
we set a label, the recipient email, a message to be shown after submission;
we don't define the redirect path or
an auto-replay message and let this form be the default contact forms.
Note the field "Machine name", near the "Label" option: it is: "contact_us".
Our contact form will be reachable at the url: "/contact/contact_us", but,
being the default contact form, can also be referenced
by the url: "/contact".
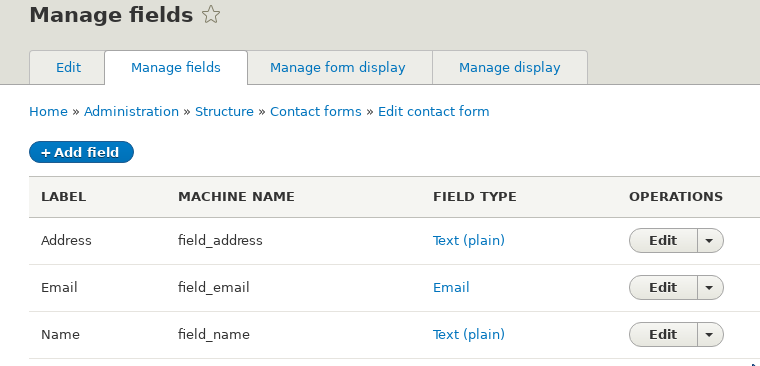
To fully define our contact form we have to click on its "Edit" button
in the page listing available contact forms.
As for content types, we have now four tabs:
a tab with general features, a tab for fields,
a tab: "form display", to define how insert data, and a "display" tab,
which defines how the contact form is shown.
We add some fields for the form:
-
A required text field for the name of the sender;
-
a required field for the mail of the sender;
-
an optional field for the sender address.
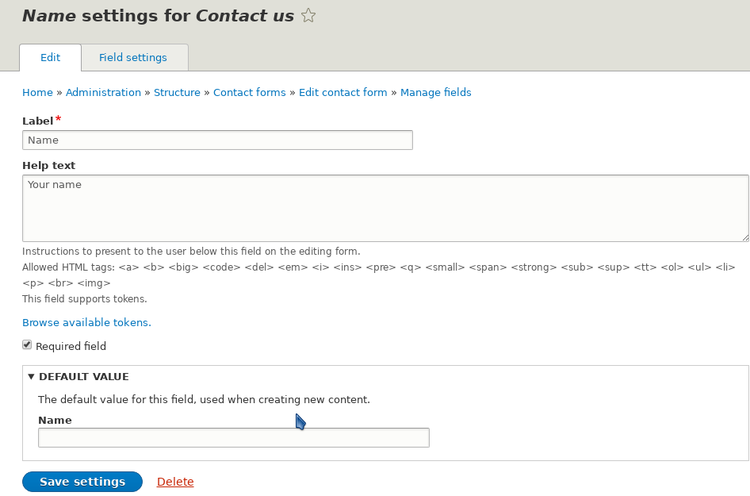
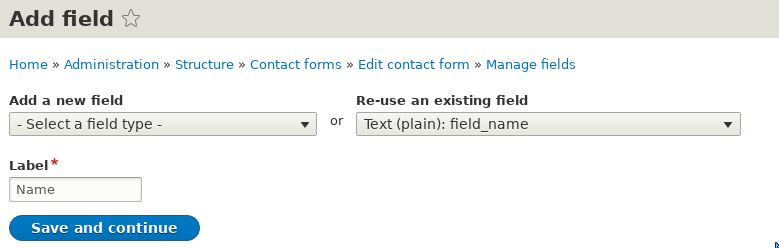
Each field has its own properties to set, as an example we show, in the
figure below, the settings of the "name" field: there is an help text,
a checkbox to set the field as required, a default value.
In the "Field settings"
tab we can set features as the maximum number of
appearances of this field in the form
or the maximum number of characters.
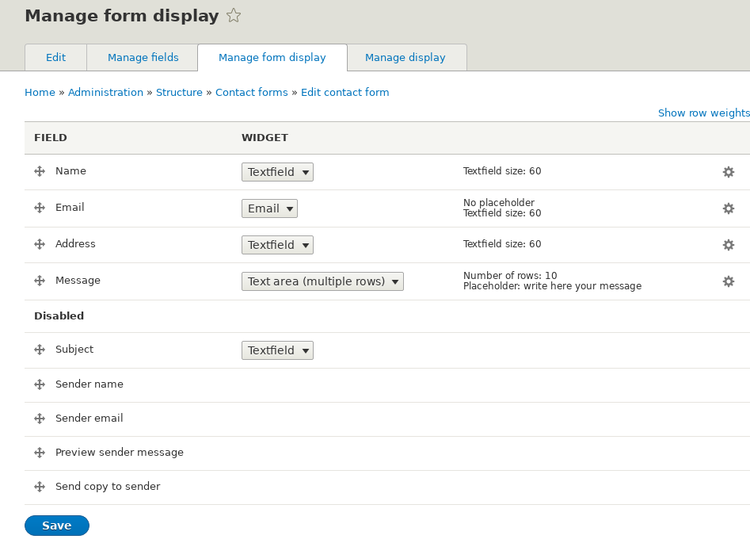
In the "form display" tab we rearrange our fields and
disable some defaults fields;
we change the number of rows in the "Message" field and set a placeholder
for it (clicking on the gear at right).
We have disabled the default fields:
"Sender name" and "Sender Email"; these
are intended for registered users,
we want anyone allowed to send a message to us.
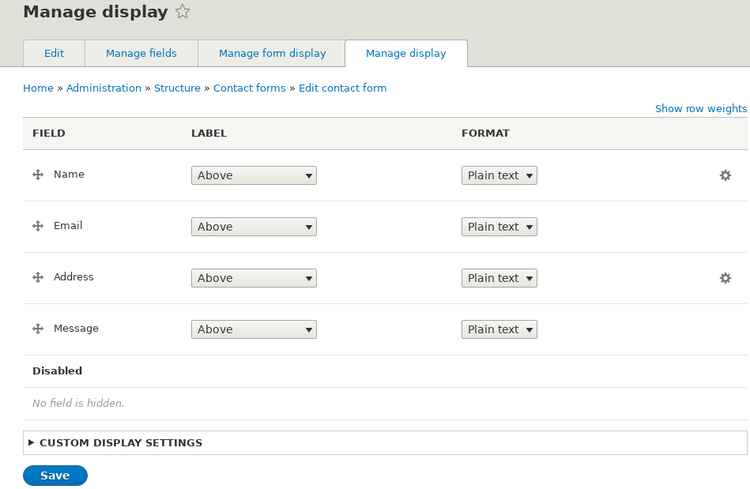
In the "display" form also we rearrange the items.
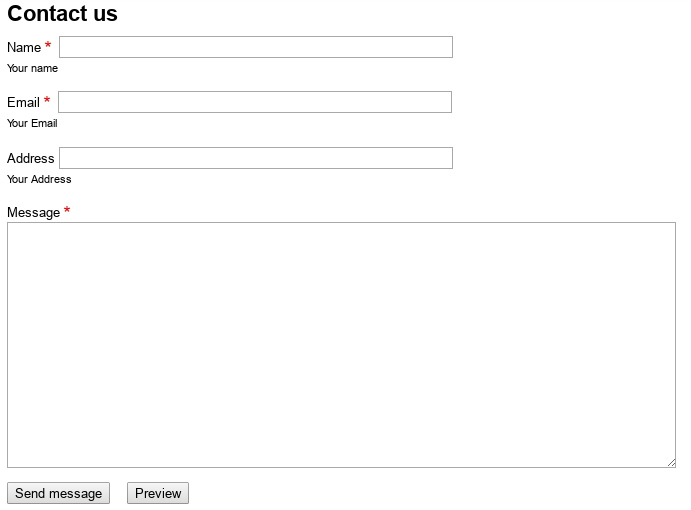
In the following figure how our contact form will appear to the site visitor:
Contact form in a menu
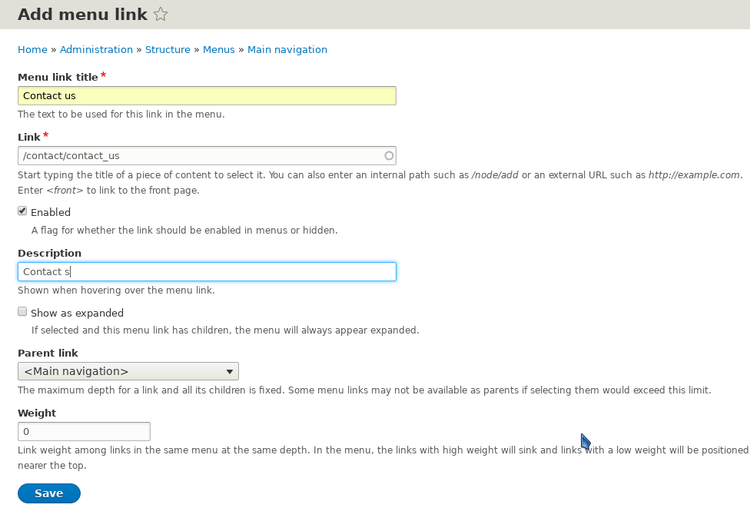
To put the contact form we have created in the main menu of our site we
have to we go to the "menu" page under the "structure" section,
and edit the menu to add our new entry.
Note the "Link" option: "/contact/contact_us"; this is the URL for our form.
Contact form in a block
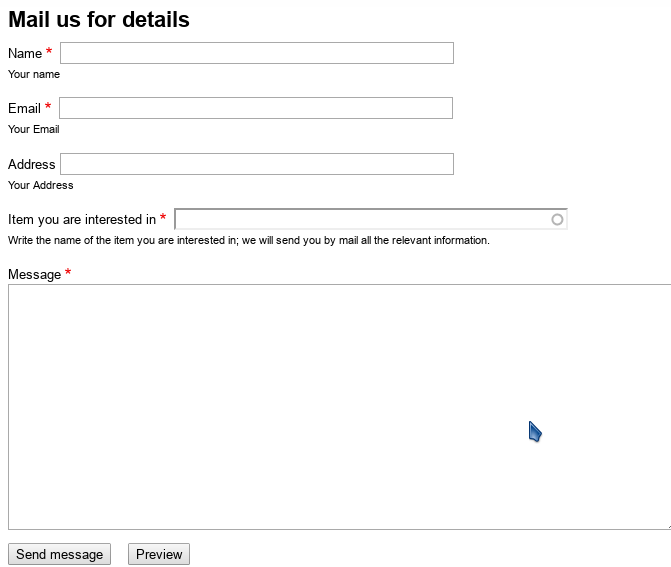
We want a special contact form to be placed in a
a block (we will see later how blocks are used).
We begin creating a new contact form,
as seen in the preceding paragraphs; this form
will have the label: "Mail us for details".
In this form we insert a new field for a link to a content,
with the label: "Item you are interested in",
this will be a mandatory field;
then we reuse the field definition of the first form for
"name", "email", "address".
The url of our contact form is build from its label, as: "/contacts/mail_us_for_details"
The form is show in the following figure.
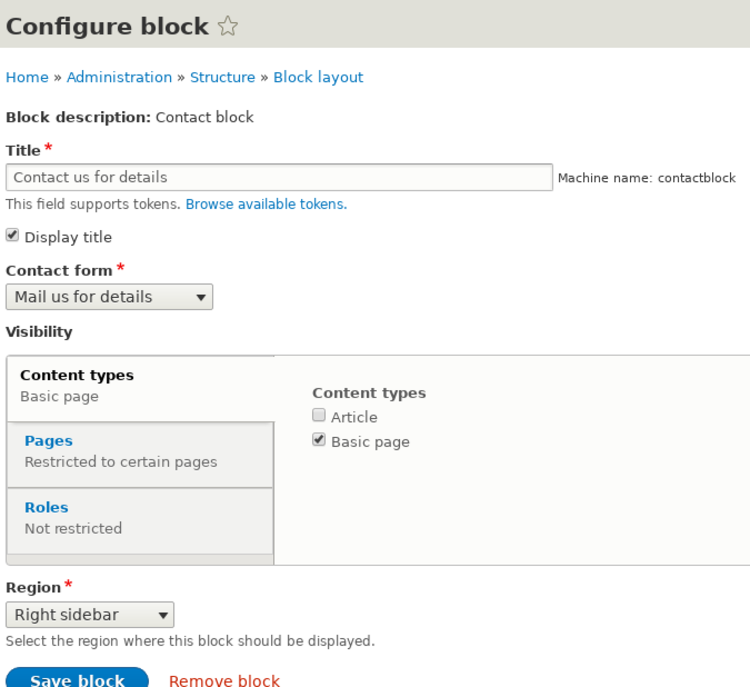
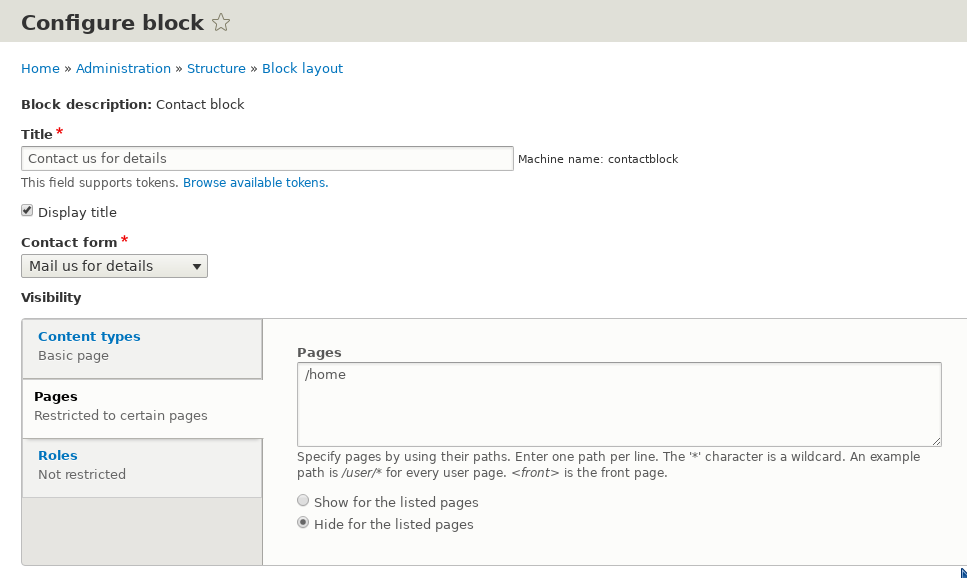
To ease the association of our contact form to a block we have installed
the addon module: "contact block". We go, in the "structure" section of
the administration menu, in the "block layout section" , then choose a region
and click on "add block".
We have to configure the block: we have to set a title,
shown to the visitors. In the "visibility" section we say
that the block will be shown for "basic pages", in the
"right sidebar" region of the page.
We can also select the pages on which the block is shown,
and limit the block visibility to some user roles.
Here we say that we don't want this block on the home page.